Showing posts with label TATTERED ANGELS. Show all posts

Tuesday, January 22, 2013

Tattered Angels CHA Winter 2013 Project

I would like to share the project I created for the Tattered Angels booth at CHA Winter 2013. WE were given the instructions to create a 12x12" canvas that we would hang in our studios for inspiration. With many of the new TA colors and papers {oh my they are spectacular} I set to work,

With color being so important in how I create I decided to look for a quote that inspires. I also wanted the background to be subtle and allow the colors to be dominant...I changed all my ideas around once I started but then was pleased with the final result!

The Full Quote:
“Art is unquestionably one of the purest 
and highest elements in human happiness. 
It trains the mind through the eye,
 and the eye through the mind. 
As the sun colors flowers, so does art color life.”
-John Lubbock


Background Texture with Viva Decor Croco Crackling Color ~ White

Canvas Corp Banner

Tattered Angels "NEW" Mistable Papers

Canvas Corp Canvas Flower with Studio 490 Flower

Tattered Angels Display at CHA

Stay tuned for all the new Tattered Angels colors, new paint products and paper...it's exciting and will offer so many options for utilizing Tattered Angels.

 Have a creative day!


Monday, January 21, 2013

Puffy Hearts & Tattered Angels

I received the sweetest puffy paper mache heart from my sweet friend Catherine. I used it to create a Valentines Day project for the Tattered Angels blog. I covered it with 7Gypsies tissue paper before giving it a coating of a new Tattered Angels Glimmer Mist color...IT'S RED. I also misted some antique lace, chiffon flower and ribbon to finish this quick & easy project.


Hop on over to see what Catherine created with her puffy heart!Have a creative day.


Monday, October 22, 2012

Tattered Angels & Gift Giving

Geesh...I thought that I would post more last week after having 3 weeks of LIFE CHAOS but it just didn't happen. You know the old saying...something about the best laid plans...lol! Today I want to share 3 projects created for Tattered Angels...fun, fast and fabulous gift giving ideas.

In my world today gifts have come down to either gift cards or money. Although this is the most personal but sometimes the most welcome. I hate using a store bought card to put these gifts in so I came up with an alternative method that can be so easily personalized for the recipient.


I have several boxes of mop tags, left over scraps of paper, left over embellishments…actually it’s my junk drawer that I keep just for this type of project!


I love the new sizes of manila tags that are available from Ranger and this project was created on the new #10 size {4-1/8” x 8-1/2”}. Using scraps from my scrap box of embossed 7 Dots paper, May Arts lace trim, quatrefoil shapes cut from Spellbinders Labels #24, Prima flowers, Tim Holtz Ideaology & 7Gypsies metal embellishments in no time I put together this rather lovely tag. To pull together all the different colors on my scrap pieces they all received a heavy misting of Tattered Angels Iridescent Gold Glimmer Mist.  On the back I glued a small manila envelope from Maya Roads that I’ve had for several years.


How about another tag created from your standard size manila shipping tag, left over papers and embellishments and a quote from Balzer Designs Stencil MINI-POPPIES misted with Tattered Angels Marmalade Glimmer Mist. Wrapping the tag with Canvas Corp twine gives it a finished look along with a gift envelope attached with Helmar 450 Quick Dry Adhesive. Another quick and easy gift tag to present as a gift.


How about a simple frame made from a manila tag for favorite photo of the gift recipient. Using the NEW size #12 {5-1/8”x10-1/2”} manila shipping tags from Ranger Inkssentials and an Instagram photo {4”x4”} in no time you can put together a cute, inexpensive mini frame with your gift enclosed using one of the fabulous mini envelopes found in so many different paper lines. With left over Pink Paislee wood letters arrow misted with Tattered Angels Boogie Board Chalkboard, Mallard Glimmer Mist and an overcoat of Guilded Gold Glimmer Mist, some Helmar 450 Quick Dry Glue I have a gift ready to go! Because I used one of my Mop Tags {because I hate to waste any of the Tattered Angels goodness} I can’t give a color description but I did use a heavy misting of Tattered Angels Iridescent Gold Glimmer Mist as an over coating!


Thanks for stopping by!!! Hopefully I'll do better this week with posting ;)


Monday, October 15, 2012

Catch-up Post...

For 3 weeks I have been dealing with several personal family issues...sad ones but I'm back and hope that I have a few weeks to breathe....BREATHE!!!!

Here is a post that was shared on the Craft-E-Corner site for Think Pink Events. I was so honored that they showcased my project as Breast Cancer Awareness is very close to my heart {I have a sister who is an 11 year survivor}.


Here is the final round-up from the Virtual Gallery Walk created by the uber talented Liz Hicks...ARTISTIC INSPIRATION: THEN & NOW. Head on over to Liz's blog to see all the projects in one place.


Today I was highlighted on The Crafter's Workshop blog...thank you Jaime!


I want to also take this time to say thank you to Scraps of Darkness kit club for allowing me to be a quest designer for September. It's an awesome kit club. Today is the reveal for October so head on over to see what the kit looks like!!


So now I'm off to clean-up my studio...uggh! Thanks for stopping by ;)


Wednesday, September 26, 2012

Ribbon Carousel and HELMAR Blog Hop


Today the Helmar Design Team are teaming up with the designers at Ribbon Carousel, to bring you a jam packed Hop filled with crafty goodness!  

Ribbon Carousel has some wonderful ribbon organizers and that is how this amazing company started. Today, we get to feature some other wonderful products that they carry, so hop along with us and have fun.

What does one do with black and orange ribbon? Hmmmm....let me see...oh yeah...HALLOWEEN! Let me share with you today 3 very quick projects utilizing ribbon from Ribbon Carousel and HELMAR Adhesives.


The 1st project is a card created from the former House of 3...a digital Halloween card. Once printed out I attached the card to solid card stock using Helmar Acid Free Professional Glue. I then pleated a gorgeous butternut squash colored sating ribbon and attached it to the card using Helmar 450 Quick Dry...you do know that it will not discolor your ribbon which makes it a perfect choice for a card.


A small canvas was created from a Tattered Angels chipboard card that was misting with Tattered Angels Cinder Glimmer Mist and Iridescent Gold Glimmer Mist. I attached 3 ribbons utilizing Helmar 450 Quick Dry Adhesive and Helmar Zap Dots in medium and small to apply the Tattered Angels Halloween calling cards. The buttons and alphabets utilized Helmar Zap Dots to complete the canvas


The last project really is just a quick way to utilize left over ribbon and dimensional stickers. I folded over the fabulous orange grosgrain ribbon and closed it with a dab of Helmar 450 Quick Dry Adhesive, then added the 3 stickers and a button and plastic spider with the same 450 Quick Dry. A fun little wall hanging I'm sending to my grandson.


Now, lets talk prizes!   

Hop along with us today and leave some blog love for our The Designers of Helmar and Ribbon Carousel for your chance to win!!
The Helmar prize is a complete 12 pack of Zap dots, including clear, black and white in circles and squares both in 1/4" and 1/2" sizes! 
The other prize up for grabs is a $20 gift certificate to the Ribbon Carousel Store!  

Thanks for stopping by and now are you Ready to hop?


Thursday, September 20, 2012

Scraps of Darkness "MY GUY" Kit Project #3

Hello...hello! Today I'd like to share with you another project I created for Scraps of Darkness using supplies from the September kit "MY GUY".  It revolves around a picture I've wanted to scrap for a very long time.

The photo is of my Dad and his father working in there Gladiola farm in Bath, NY. My grandfather was a professional photographer {specializing in postcards} but in the 1920's stock market crash his business ground to a halt. So what had once been a hobby for him turned to a source of income, selling flowers at a roadside stand. My dad was in his early teens and I believe this photo was also hand colored by my Grandfather. There are still postcards of his photos floating around the Finger Lakes region of NY.


Kit Ingredients used:
Authentique paper ~ Academic
Kaisercraft paper ~ Sears & Son collection
Prima Craftsman paper
Kaisercraft  Sears & Son Die Cuts
Tattered Angels Chalk Glimmer mist
Tattered Angels Natural Elements paint kits ~ Aged Mahogany ~ Granite
TCW Gear stencil
Helmar Acid Free Professional Glue ~ 450 Quick Dry Adhesive
Ribbon
Sulky Thread
Janome Memory Craft 6300

If you are looking for a kit club to subscribe to I suggest you take a look at Scraps of Darkness...if grungy & alternative isn't your style there is also Scraps of Elegance for the romantic souls!

Thanks for spending some time with me. I would love to hear your thoughts.

Have an ARTSY day!


Sunday, September 16, 2012

Scraps of Darkness "My Guy" Kit Project #2

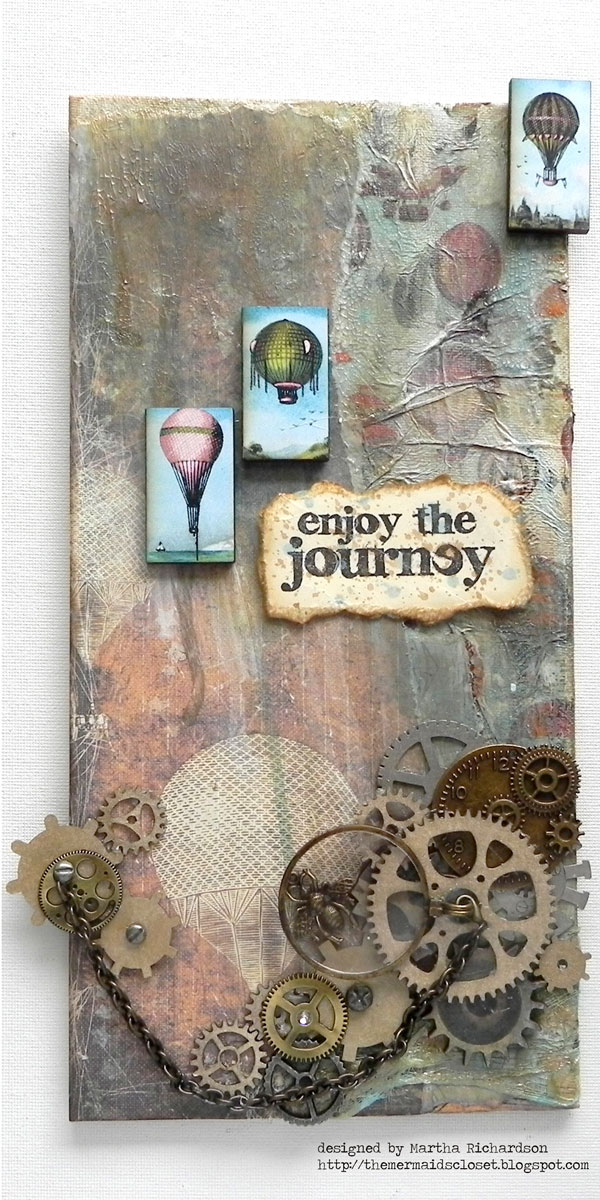
Today I would like to share with you another project I created from Scraps of Darkness Septemeber kit...MY GUY! I love working on canvas or canvas boards so that was my base for this project with some Steampunk added for good measure. Here is all the information you need on this months kit ingredients ;)

Supplies used:
Prima Marketing Craftsman Collection
Prima Marketing
Kaisercraft Sears & Son Collection
Handcrafted Wood Tiles
Tattered Angels Glimmer Mist ~ Post Card, Blue Skies
Viva Decor Croco Transparent
Tim Holtz Distress Ink ~ Gathered Twigs
Tim Holtz Distress Stain Tarnished Bronze
Tim Holtz Stamp
Eyelet Outlet brads - "Screw"
Misc. Embellishments ~ 7 Gypsies, Prima
Helmar Adhesive ~ 450 Quick Dry, Acid Free Professional Glue, Liquid Scrap Dots


Off to do some more creating...have a fabulous day!

Saturday, September 15, 2012

Scraps of Darkness MY GUY Kit REVEAL!

I highly suggest you check out this monthly Kit Club SCRAPS OF DARKNESS...I love the concept...for THE ALTERNATIVE SCRAPPER. 

Al-ter-na-tive: adj. - 
1. offering or expressing a choice.  
2. different from the usual or conventional.  
3. Scraps of Darkness Kit Club.

Over the next month I will be sharing several projects using 
materials from My Guy Kit. I would like to share with you the 
LO I created using the September challenge sketch included with 
the kit. It was perfect to create a LO around my father,
the man I called POP. He was such a snappy dresser, amongst other
intriguing things about him...at 15 he was playing in The Cotton 
Club in Harlem, as President of his student government he introduced
Robert Frost to the student body at SUC at Fredonia, NY and saw 
Toscanini's last performance...just to name a few.


Kit ingredients used:
Prima Craftsman Paper Collection
Kaisercraft's Sears & Son collection
Kaisercraft Sears & Son Collectible Die Cuts
Creative Impressions Twill Ribbon - Ruler - 1 yard
Eyelet Outlet brads - "Screw"
Prima Metal Trinkets - Typo Bulbs
Tattered Angels Post Card Glimmer Mist
Helmar 450 Quick Dry Adhesive
Helmar Acid Free Professional Glue

Make sure to check back to see more projects this month!


Thursday, September 13, 2012

The Whatevers #3 Creative Storytelling...The Beach


Yay I got it finished in time for the next challenge to be released on 9/15...are you in?

Here’s my story & I’m sticking with it!!!


Hidden journaling behind tag:
It was another rainy day at the beach…the kind of rain that would go on all day. Grandma decided to bake my favorite gingerbread cookies and I kept her company working on all the pictures she gave me.

I found one of the four sisters all dressed in their finest summer whites, sitting for a formal portrait at the beach. Gosh…weren’t they hot, why would you wear dresses to the beach?

As the afternoon went on I kept digging through the box of photos and was so pleased with the treasures I found. I actually found pictures of my aunties Tootsie, Mamie and Weezie in bathing dresses…still in dresses at the beach. Then I found a photo of my Mom & her siblings…I would love to know what they were laughing about. And then one of us.

Although time has marched on those 4 sisters were always at the beach with us.

Hidden journaling{upper right corner}
1st generation born in America. L to R. Adolf, Emma & Sophia {my Mom}. Grandma & her 3 sisters would sit on the beach and watch as  they frolicked on the beach, always properly dressed…do they ever go swimming?

Hidden journaling {lower left corner}
Going to the beach was always a family affair…it was also a daylong adventure that included a picnic lunch and dinner. It was 3 generations enjoying the sand, sun and water.  We are the 2nd generation born in America {Grandma & her family immigrated from what was once known as Loetzin, East Prussia in the early 1900’s}. For some reason there are only 4 of us in the photo and I suspect the 2 youngest were in baby carriages.  L. to R. Michael, Melinda, ME, & Michele…missing Mary & Mark.


There is still time to play along with this fun challenge and you can find all the details here.

Wednesday, September 12, 2012

Color Theory with Tattered Angels


Color is usually where a project starts for me…it has to whisper to me, it has to strike the right chord. I actually taught color theory in my classroom when I taught Clothing & Textiles, Interior Design and believe it or not in my Foods classes for the past 40 years. LOVE Color Theory ;)

This project looks at ANALOGOUS (uh-NAL-uh-gus) colors which sit next to each other on the color wheel. They tend to look pleasant together because they are closely related. If you want to learn more about it color I suggest you visit COLOR MATTERS website.

If you look at nature for inspiration you will find perfect examples to draw inspiration from. Here is a picture of a Moonflower blossom that I took while on vacation this summer, it is a perfect example of an ANALAGOUS color combo.
I created this 5x7” canvas envelope from Canvas Corp using the Analagous color scheme of blues, greens and violets.

Supplies needed:
Tattered Angels Chalkboard Glimmer Mist ~ Fairway, Calypso, Splash, Boogie Board
Tattered Angels Glimmer Mist in Key Lime Pie, Moss & Icicle Blue
Canvas Corp: 5x7” canvas envelope
Helmar 450 Quick Dry Adhesive
Pink Paislee Pleated Ribbon
Balzer Designs Stencil: Peacock Feathers
Misc: Hand Cut canvas leaves, peacock feather, dragonfly belt stud

Have a creative day...thanks for stopping by:)


Thursday, August 30, 2012

More Stencil Storage Ideas! Update :)

Yesterday a blog post by the incredible Ronda Palazzari on her stencil storage ideas was just the push I needed to finish what I had started.  I was originally influenced to share my idea by a post the talented Alissa Fast  had on how she stores her stencils…and the same goes for Ronda! Funny how great minds think alike….

I he{ART} stencils. I love using them and use them OFTEN, in fact I started a series on this blog but life somehow got in the way and I never finished it. My favorite stencils are from The Crafters Workshop, although I have others I find them to be the BEST!!!

Here is the original post where I shared a tutorial on making your own background papers.


Yesterday a blog post by the incredible Ronda Palazzari on her stencil storage ideas was just the push I needed to finish what I had started.  I was originally influenced to share my idea by a post the talented Alissa Fast  had on how she stores her stencils…and the same goes for Ronda! Funny how great minds think alike….

I took a 12x12 album that I wasn't using and decorated the cover with various stencils. 

I love how my 12x12 stencils fit perfectly in the 12x12 protectors.

I have been very pleased with this method but I was running into trouble of how I would store my 6x6 stencils and was using 8x10 protectors but that meant I had to go through several stencils before I might find the one I wanted to use. Thank your Ronda for the suggestion of using 6x6 sheet protectors…problem solved!

So now I'm off to find some 6x6 sheet protectors. How do you store your stencils? Thanks for stopping by. I found a great source at Amazon.com and I will show you how great they are in my next blog post ;)


Saturday, August 18, 2012

Altered Spoon Blog Hop with Susan Brown...Happy Blogiversary


Please join me in wishing a big HAPPY 5th BLOGIVERSARY to Susan M. Brown @ "SBARTIST: Painting in the Dark". I was thrilled when Susan asked me to play along and alter wooden spoons...it was a 2-fold mission for me...stretch my creativity and celebrate my retirement as a High School Foods teacher. 


After a lot of creative thought I decided to do something that I could hang and remind me of how much I love the beach...the sun, the sand, the water, the seashells...my happy place. So here are  2 projects that I created by altering wooden spoons.

I created a swag from materials & colors you would find on the beach. The spoons were misted and glammed with Tattered Angels products and embellished with sea glass, shells and beach symbols. A canvas flower embellished with sea glass and burlap rope finishes of the decoration.


Because I only used 3 of the 4 wooden spoons I decided to create a hanger for a beach sign and a seashell wind chime. This wooden spoon was painted and a heavy coat of Tattered Angels Glimmer Glam in Sandy Beach was applied, along with a small macrame hanger I created.


Materials used:
Helmar 450 Quick Dry Glue, Liquid Scrap Dorts
Tattered Angels Glimmer Mist ~ Crushed Shells, Atlantic Beach
Tattered Angels Glimmer Glam ~ Chandelier, Pixie Dust, Sandcastle
Tattered Angels Chalkboard ~ Sandy Beach, Splash
Canvas Corp Burlap Flower & Rope

Make sure you hop on to the blogs DeeDee Catron, Roni Johnson, Barbara Rankin, Leslie-Rayhe Strickland and Becky Voth to see what they have created with wooden spoons.

Thanks for stopping by and helping me wish Susan a big, huge HAPPY BLOGIVERSARY!!!


Presenting the artistes de spoon...