Monday, February 25, 2013

The Best Intentions and a Goodbye!

Last week I planned to blog at least 2, maybe 3 days. I'm trying to get on a schedule but it turned out to be a week where I was out of the house from Wed. on...running errands, appointments...everything but being in my studio! So here it is Mon. again and I'm planning on the same thing...but...we'll see!

Now about that goodbye...I resigned from the Tattered Angels Design Team. It was time and not a decision made lightly but life is about changes. At one time it was a fabulous design team with some of the most talented designers but over the past year, with all the company changes it got lost in the transition. You won't even find the Tattered Angels Inspiration blog...totally gone! 

But I am so excited to be able to work with other fabulous products and companies. I have teaching workshops on the horizon, a guest blog post happening on April 6th, art journal club and who knows what else. VERY EXCITING TIMES!!

So today as a goodbye to Tattered Angels I want to share some of my Tattered Angels projects...a flash from the past!


Without realizing what would be coming down the pike here is one of my last TA projects created...


What are your creative goals this week?


Tuesday, February 19, 2013

Organized my Tim Holtz Distress Inks or Things That Make Me Happy

Sometimes it's the little things that can make one happy. I've wanted to label all my Tim Holtz Distress Inks and change the way I was storing them. I knew I wanted the labels to display the color and on all 4 sides but I just never got around to it. 

I try to organize my work space in a way that creates an easy work flow. I had the Distress Inks in plastic storage boxes but I would have to pull out a whole pile to look through to find the right color. When I say I wanted to create an easier work flow I remember reading that this is one way to organize your studio, products, etc. Basically that is the general way that my studio is set up but it still needs tweaking and this is one of those TWEAKS ;)

This side of my studio stores most of my inks, paints, stamps,  and tools for most projects. It is directly in back of my project table and within arms reach. I don't have to get out of my creative mojo to look for something I need. I LOVE my Ikea Expedit shelf and I have found various inexpensive baskets and containers to hold my supplies. The stamps are organized by designer, paints & inks by company. 


I found some Avery labels and swiped the ink color on the labels needed. I hand wrote each label because I wanted to get to work and knew that it would take time for me to get to a laser printer. I love how the labels took the color!

I decided to label all  my favorite colors first knowing that I would get bored doing it.  This was a real eye opener when I realized which colors I use the most. At this point I stopped for the evening.


When I started back up I went ahead and again did the colors I like the most out of the remaining inks. You can see the ones I left for last...lol!


I chose to label all 4 sides because when I clean up I don't want to waste time looking for the side with the color. It was worth the little bit of extra time! Now I had to find a way to store them. I looked online for storage ideas and realized I didn't want to spend the money {would rather by supplies} or take the time to make one. There are some great storage ideas on line but I went "shopping in my house" and came up with 2 different containers just perfect for the task at hand! The smaller one contains my favorite 21 ink colors...yippee...and it will sit on my project table with in an arms reach. 


The remaining 27 ink colors will be stored on a shelf in this miniature armoire. Both of these storage containers will eventually get altered but I can live with them for now.


I figure the entire project took about 7 hours over a 3 day period. Here is the link to the chart provided by Ranger Ink if you want to do this yourself. It must be printed with a laser printer, an ink jet printer will not work as the words will smudge when you apply the color.

I hope this gets you thinking on how your craft area is organized. Do you have any tips or suggestions?

Thanks for stopping by!


Friday, February 15, 2013

My Weekly Review & Stencil Love

I accomplished a great deal this week and I'm congratulating myself. I'm still learning how to be retired...I thought the transition from working to being a lady of leisure would be fast and painless. I have since discovered that it really is transformational and would require many stops & starts!

I completed 3 blog posts for this personal blog:
http://themermaidscloset.blogspot.com/2013/02/the-whatevers-5-catching-upfinally.html

http://themermaidscloset.blogspot.com/2013/02/the-whatevers-6.html

http://themermaidscloset.blogspot.com/2013/02/anatomy-of-tag-with-7-dots-studio-and.html

A project for the Helmar DT blog featuring 7 Dots Studio:
http://helmarusa.typepad.com/blog/2013/02/hopefully-from-7-dots-studio-sticks-together-with-helmar-.html

Several projects for myself...oh and cleaned my project table which...woot-woot... is still clean!
         Journal Page                          Jesse James Bead Bracelets

   Pie Chart Ronda Palazzari                 Stencil Girl Stencil Club

    Journal Cover                     Vine Profile

        Antique Ledger

Also received and listed an order of newly released stencils from The Crafter's Workshop in my Etsy shop. I am waiting for more stencils to arrive, different from the ones already listed.


I'm now going to see what else I can accomplish today as it's only 10:30 am EST...yippee!

Have a GREAT weekend.


Wednesday, February 13, 2013

The Whatever's #6

I am determined...DETERMINED to get caught up before The Whatevers #8 is revealed this Friday 2/15! Here is my take on Photo #6.


I started with a background I created using various stencils from The Crafter's Workshop and various spray inks & mists. The original post can be found here.

Here's the story to go with my page:

"Early Saturday morning we left Hatteras and boarded the ferry to go over to Ocracoke Island. The Hatteras Ferry is free and takes 40 minutes to get to Ocracoke. We always go at this time to buy fresh figs so Grandma can make fig preserve for the winter months.

While visiting we always go to the FIG FAIR. Another day of fun, sweet treats and salty air. We spend the night at Cousin Emma's house. It is always loud and noisy with her six children there. Before heading back home we stop at a bakery named WHEN PIGS FLY. Three friends of Grandma own it and we have lunch while they catch up. My Favorite treat is the Fig Cake. It is yummy!"


I have included the recipe for the Fig Cake...which really is a delicacy from Ocracoke Island. Figs are the only fruit that can grown on the island. Ocracoke is home to 12 varieties of figs. The history of fig tress on Ocracoke dates back at least to the 1700s. Ocracokers have long relied on fig trees as their primary source of fruit.


Ocracoke Island Fig Cake with Buttermilk Glaze

-- For the Fig Cake --
Vegetable shortening, for greasing the pan
2 cups all-purpose flour, plus more for flouring the pan
3 large eggs
1½ cups granulated sugar
1 cup vegetable oil
1 tsp ground nutmeg
1 tsp ground allspice
1 tsp ground cinnamon
1 tsp salt
½ cup buttermilk
1 tsp baking soda
Hot water
1 tsp vanilla extract
1 cup coarsely chopped preserved figs or fig jam
1 cup coarsely chopped pecans or walnuts

-- For the Buttermilk Glaze --
½ cup buttermilk
½ cup granulated sugar
¼ cup (½ stick) butter
1½ tsp cornstarch or all-purpose flour
¼ tsp baking soda
            1 tsp vanilla extract

         Instructions

                       To make the cake:
Heat the oven to 350° F. Grease and flour a 10-inch tube pan and set aside.
In a bowl, beat the eggs well until light yellow and smooth. Add 1½ cups sugar and the oil and continue beating well to make a thick, smooth batter. In small bowl, combine 2 cups flour with the nutmeg, allspice, cinnamon and salt and stir, using a fork, to mix well. Add half of the flour mixture to the egg mixture, stirring with a wooden spoon to blend well. Add half of the flour mixture to the egg mixture, stirring with a wooden spoon to blend well. Add ½ cup buttermilk and mix well.

                       Dissolve 1 teaspoon baking soda in a little hot water. Add the remaining flour along with the dissolved baking soda and 1 teaspoon vanilla into the buttermilk mixture and stir to mix everything into a fairly smooth batter. Gently stir in the figs and nuts, mixing just until evenly distributed throughout the batter.

                       Quickly scrape the batter into the prepared pan and bake for 40 to 50 minutes, until the cake is handsomely brown and firm on top, and until a wooden skewer inserted in the center comes out clean. While the cake bakes, prepare the buttermilk glaze and set aside until the cake is done.

                       To make the glaze:
In a medium-size saucepan, combine ½ cup buttermilk, ½ cup sugar, the butter, cornstarch and ¼ teaspoon baking soda. Bring to a gentle boil. Remove at once from the heat, stir well and let cool to room temperature. Add 1 teaspoon vanilla and set aside until the cake is done.

When the cake is done, let it cool in the pan on a wire rack or folded kitchen towel for about 15 minutes. Loosen the cake from the pan gently, running a table knife around the sides of the pan, and then gently turn it out onto the wire rack. Turn the cake top side up and carefully place it on a serving plate or cake stand. Spoon the buttermilk glaze over the warm cake, and let cool completely.

Makes 8 to 10 servings.
Source of Recipe
From "Southern Cakes" by Nancie McDermott
Links to more recipes for this dense cake that closely resembles the southern Jam Cake.
Well I'm off to have another day filled with lots of creative mischief. Now only one more Whatevers before Fri. :)


Tuesday, February 12, 2013

Anatomy of a Tag with 7 Dots Studio and Helmar

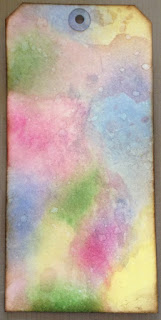
Today a thought I would share a quick pictorial of the process I used for creating the tags for the 7 Dots Studio & Helmar Promo Week.

Gather all  materials

Squish Distress Ink directly on non-stick craft sheet

Spritz with water...look how the colors
have intensified

Oops...left tag MUDDY...why?
This was the 2nd tag and 2 complementary colors
 had mixed together...not pretty!

Fixed tag by adding Distress Ink directly on tag ;)

Distress edges with my favorite brown...
Gathered Twigs

Adds just the right amount of depth & interest

The muddy tag all fixed...happy dance!

Embossing with Distress Ink applied to embossing plate

Layering papers for tags

                                     
Hmmm...thinking...the hardest part ;)


Finished tags

Materials used:
7 Dots Studio ~ Hopefully Collection
Inkessentials Craft Taga #10 Manilla
Gathered Twigs 
Squeezed Lemonade 
Mowed Lawn
Spun Sugar
Shaded Lilac
Vagabond Die Cutting System
Tim Holtz Alterations ~ Mini Paper Rosettes
Sizzix Embossing Folder ~ Paisley Palooza
Helmar Acid Free Professional Glue
Helmar 450 Quick Dry Adhesive

Thanks for stopping by...I love making tags...do you?


Monday, February 11, 2013

The Whatevers #5 Catching Up...FINALLY

Have you been following along with The Whatevers...the brainchild of Vicki Chrisman, Nathalie Kalbach & Catherine Matthews Scanlon? I have but fell behind which caused me to be quite sad as this has been such a great challenge! If you haven't I've provided their blog links. So today I am determined to get caught up because this Fri., 2/15 will be the reveal for Photo #8.

Here's Photo #5 and my background story.


"I always knew when summer was coming to an end and I would soon be leaving Grandmas house.  Every summer in August we made an annual trip down to Hatteras, NC to visit a family friend. It was during the Annual DAY AT THE DOCKS celebration in Hatteras Village. This weekend trip was the signal that summer was rapidly coming to an end and I would have to leave to go back home.

Because Grandma didn’t have a car we rode the trolley along the ocean highway from Nags Head to Hatteras Village. I loved that ride where you could watch the waves roll in, see the seagulls flying about, occasionally spot a school of dolphins and smell the sweet ocean air. I also knew that I would have a chance to run around the carnival, riding the ponies, tasting sweet treats but the best part was that I would get a huge, piping hot bowl of HATTERAS CLAM CHOWDER. There was always a contest to see who made the best chowder…if you were the lucky one you held that honor for a full year until the next time.

After a day filled with fun and lots of good food we would spend the night at Cousin Tish’s house. She lived right on the beach and I loved listening to the sounds of the waves rolling in as I fell off to sleep."

Here's my journal page:


Recipe for Hatteras Style Clam Chowder

Here's the recipe:

Hatteras Style Clam Chowder

1 tablespoon vegetable oil
1 large onion, chopped
5 stalks celery, sliced
4 carrots, sliced
4 cups peeled, cubed white potatoes
2 (16 ounce) cans minced clams, with juice
3 quarts clam juice
1 teaspoon dried thyme
1/2 teaspoon ground black pepper
8 slices crisp cooked bacon, crumbled

In a large pot over medium heat, cook onion, celery and carrots in oil until they begin to soften.   

Stir in potatoes, clams, clam juice, thyme, pepper and bacon.

Bring to a boil, then reduce heat and simmer 20 minutes, or until potatoes are tender. 


Ok so there is #5...now off to finish #6 and I have another great recipe to share with you ;)

LINK:

Have a great day ;)